Projects > SC3 Modified Philips SPC900NC

After imaging with an unmodified ToUcam II Pro and an ASTSC3 purchased from Astronomiser for a couple of years I finally decided I would have a go at modifying a webcam myself. My decision was based as much upon my interest in astronomy as it was a fondness to experiment with home made electronic circuitry. I've found the ASTSC3 to be very sensitive and have produced what I believe to be quite acceptable images with it, so I certainly wasn't expecting to build a camera any more sensitive.
I spent several weeks reading every web page I could find with details about modifying standard web cameras. It didn't take long for me to learn that the Philips SPC900NC is currently one of the most popular webcams to modify. Due to the circuit layout this camera is particularly suitable for modification as the connection points for some of the modifications do not involve lifting pins and cutting tracks. With this in mind I purchased an SPC900NC off of e-bay for the sum of about £30.
I used the excellent guide on Steve Chamber's website to help decide which modifications were of interest to me. I chose to make the long exposure modification (SC1), and to replace the CCD with the more sensitive Sony ICX424 (SC3). I was in two minds whether to make the amp-off modification (SC1.5) or not. Some articles I found mentioned that the ICX424 is less susceptible to amp glow and may not be required. However, after reviewing half a dozen different websites, some with example dark frames comparing amp-off and amp-on exposures, I was convinced that it was worth making this modification too.
I had hoped to find a modification which would enable me to use only USB connections between the computer and the camera, and do away entirely with the parallel or serial connection. Most modern laptops don't come equipped with parallel or serial ports and USB adapters will not work with most modified webcams. The reason they will not work is because the modifications require three separate control pins to be used which is possible with hardware serial ports, but USB serial ports provide only two channels (RTS and DTR).
I did stumble across a very interesting website detailing a technique Michael Posavec has found to control the camera entirely by USB. Ingeniously he made use of the volume control of the built in microphone to enable and disable long exposure. More details can be found on Michael Posavec's website here. I chose not to make this modification as it is not currently supported by any of the standard imaging programs, and it is always possible to make a circuit to allow a parallel/serial operated camera to function with a USB serial adapter.
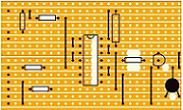
After several weeks of reviewing circuit diagrams I eventually decided to perform the long exposure and CCD replacement modifications designed by Steve Chambers, and the amp off modification designed by Greg Beeke. Rather than using two additional transistors for the amp off circuit I chose to follow the same principle detailed by Peter Lloyd which uses one of the spare NAND gates on the 74HC00N IC. Once I had made sure I understood the principles behind the circuits I drew them out and put together a stripboard layout diagram. I purchased all the parts I needed from Maplin and began working on the circuit to control the long exposure and amp off controls. The Sony ICX424 CCD was purchased from Framos for about £70 (the only place I could find to purchase single chips). Before you can make a purchase from Framos it is necessary to join their club. In my case this took a couple of days.
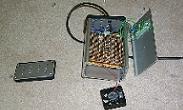
Once I had constructed the long exposure and amp off circuit I opened up the SPC900NC webcam and was slightly surprised just how small the circuit boards inside are. A steady hand would be needed while soldering! The SPC900NC turned out to be much easier to modify than expected as the large black connectors between the boards can be used to provide a connection point to pads and pins 8, 10 and 13. I chose to bend the pins in the connector in case I needed to reinstate the connections. The Greg Beeke modification requires only a single connection to the SPC900NC circuit board, and proved to be the most difficult to make. I used hot glue to hold the wires in place as soon after making the solder connections as possible. This proved a resounding success as none of my connections broke afer being made.
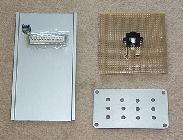
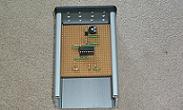
I had great difficulty removing the original CCD from the SPC900NC and eventually decided to cut the pins on one side of the CCD with a craft knife. I then broke the pins on the other side by bending the CCD. As the CCD pins all remained in the circuit board they provided convenient solder points on which to attach the wires to the new CCD. I used a piece of stripboard to mount the ICX424 to my project box. Two slots were cut in the stripboard through which the CCD pins protruded. I then soldered small wires between the pins and the SPC900NC circuit board. I was concerned that the length of these wires may introduce noise, but this hasn't proved to be the case so far (at least not noticeably). The microphone and LED on the SPC900NC were both removed before being mounted in the project case along with the circuit I made earlier and a small (40mm x 40mm fan). The first fan I tried would not function as it was 12V. I bought a 5V fan in the end which works fine.
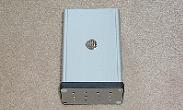
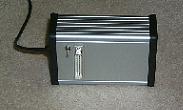
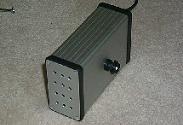
My metal working skills aren't brilliant, but the aluminium case I purchased from Maplin proved to be reasonably easy to drill. I drilled holes in both ends for the purpose of cooling, and a large hole through which the CCD lens assembly protrudes. I had originally planned to connect the USB cable to some of the spare pins on the parallel port socket and to use a very short USB cable between the remote end of the parallel cable and the computer. I was concerned that this would introduce too much interference so I abandoned this idea and used the original USB cable instead.
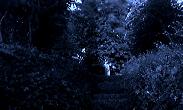
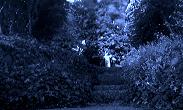
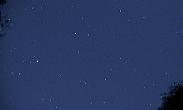
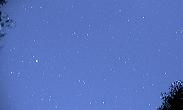
When all the work was complete I started testing and was happy to discover that everything was working as expected. I tested the long exposure modification first, and you can see the results in the images. My garden is very dark in the evening so it was ideal for testing purposes. I also carried out a couple of tests pointing the camera towards the sky (which is not as dark as I would like!). The blue colour in these exposures surprised me at first as the ICX424 is a black and white chip. This turned out to be caused by the settings I had selected in K3CCDTools.
My final tests were to confirm the operation of the amp off circuit. I produced 5 minute dark frames to compare the difference between amp on and amp off exposures. The 100k variable resistor needed to be set to about 50k before I could see any difference at all, and the lower the resistance the more reduction on amp glow was noticeable. I finally settled on 25k for the variable resistor (I'm not sure exactly what voltage is being delivered to the CCD as I could not easily gain access to the SPC900NC circuit to test as it was already mounted in the project box). I did find 25k a little low compared to the results of others, though this may be due to the combination of using a spare NAND gate on the 74HC00N and a very low gain transistor in the amp off circuit (2N3904). As you'll see, there is still some amp glow noticeable (and quite a few hot pixels), but it is significantly less than with the amp on.
All in all I consider the modifications a complete success and look forward to trying out the camera on the night sky. I'd like to thank all the other people I have referred to in this review, particularly Steve Chambers and Greg Beeke. These people have contributed considerably to amateur astronomy and have enabled us to produce outstanding images which can rival images taken by professional observatories. I hope this review will convince others to carry out their own modifications. It's not as difficult as you might think, and far more rewarding than buying a camera from a shop (not to mention considerably more economical!). Anyone wishing to carry out these modifications will need to agree to the terms clearly defined on Steve Chambers' website.If anyone has any queries based on this review, or would like further information then please contact me.
The images above were taken while testing the camera's long exposure mode. The images below show the difference in 5 minute dark frames with the amp on (left) and amp off (right).
