Projects > SkyCam3

While Mark II of the SkyCam was an improvement over the original model, it still had a number of problems that needed to be rectified. The most important among these was finding a way to keep the camera from overheating. In the Mark II design the camera was inside the dome and experienced temperatures of up to 65C on the sunniest days. The intended solution to this problem was to place the camera underneath the dome with just the lens inside the dome. Another new addition to the updated design was to include a focusing mechanism, since the Perspex dome slightly changes the camera focus making it difficult to achieve optimum focus. Much thought went into trying to find a way to fit the focusing mechanism into the dome while still retaining the shutter mechanism. Ultimately I decided to do away with the shutter and saved some space within the dome by using a small dew heater instead of the string of resistors I used in the Mark II version.
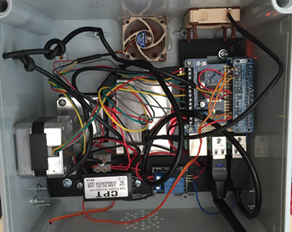
A larger project box helped accommodate the Raspberry Pi and allowed room for the larger motor. I also replaced the 5V power supply with a 12v supply, and fitted a splitter to provide both 12v and 5v. The use of a 12v power supply allows for more flexibility and a better range of adapters. It also makes selecting resistors for the heater ring easier, though for this design I used an off-the-shelf model.

Much of the original design was carried forward, including all the control code, the Perspex dome, lens and the continued use of the black Perspex to reduce reflections. The ASI120MC from the Mark II had overheated and was no longer usable, so for this model I used an ASI120MM. Once the Mark III had been built, a few problems became apparent. The first problem was moisture within the dome. This had been a problem on earlier designs, so to overcome this I created three holes in the base of the dome. Two of these were covered with a vacuum cleaner filter, while the third had a fan fitted on the underside. The idea behind this modification is to draw air through the two filtered holes and out past the fan. In practise this does help and removed the moisture completely, which I suspect could have been created by the silicone sealant setting process. Dome misting is still an issue, but mostly that's resolved by the heater ring.
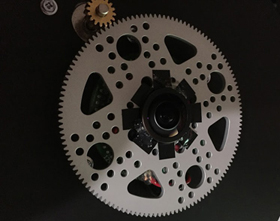
A more challenging problem was the camera still overheating. The extra cooling provided by the fan under the dome made little difference to the temperature. The eventual solution was to create a 'shield' which covers the dome completely during the daytime. A motor opens the dome at sunset, and closes it again an sunrise. While this resolves the overheating problem, the challenge was finding a way to motorise the shield and to provide enough motor torque to move the shield reliably. I had to build the shield as light as possible after an initial failure using a Perspex box. The lightweight version was made from 10mm strips of aluminium covered by a vinyl table cloth. Even this lightweight version requires a counterweight and a high torque Nema-17 motor to move reliably.
The Mark III SkyCam has been running since 2017 and has proven to be superior to the Mark II, producing better quality images which are compiled into daily videos after sunrise the following day.


