Projects > SkyCam
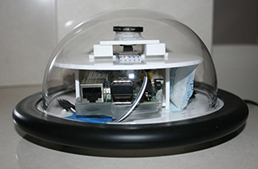
For some time I had been considering buying a Raspberry Pi, but wasn't quite sure exactly what I would do with it. One of my potential project ideas was to use the Raspberry Pi as a meteor detector, along with the Pi camera which was released a year or so ago. Unfortunately the Pi camera had a maximum exposure limit of about 1s and was not likely to be sensitive enough for that purpose. Instead I decided to build an 'all sky camera'.
I was unable to find a suitable weatherproof case, so I realised I'd need to construct my own. I decided to use the Pi Noir camera instead of the standard colour camera since the lack of the IR/UV lens may make it a little more sensitive. To reduce cabling requirements I also chose to use a small USB wireless adapter instead of using the ethernet port. I did start looking at powering the project using a solar panel, but that was going to make the project much more bulky and expensive so I decided against it.
Quite early on in the design I decided to add a temperature sensor which connects to one of the Pi's GPIO ports. The temperature sensor was the first part of the project I started working on. I'm using a DS18B20 temperature sensor which presents the temperature readout as a flat text file. I constructed a shell script which I've scheduled to run via a cron job every 30 minutes to read the text file and convert the information to Celsius, before logging this to a daily temperature log file along with the time. Each time the script runs the latest reading is plotted on a temperature graph using GNUPlot. I've added some additional logic to annotate the graph with daily minimum and maximum information.
After completing the temperature logging part of the project I started looking at the camera. This turned out to be more tricky since I needed to invent my own way to determine the correct exposure setting. Luckily some changes were made to the camera firmware which increased the maximum exposure threshold from 1s to 6s. Using the camera in auto mode meant I could not go above 1s exposures, but at night I need to force 6s exposures at the maximum ISO of 800. My solution was to create a script which takes a small thumbnail size monochrome image using the 'auto' setting. I then use Imagemagick to determine the average brightness level across the image to determine whether the image is correctly exposed. If the image is underexposed I try the process with a 1s exposure at ISO800. If this is underexposed I try again using 2s at ISO800. If that is under exposed I try 4s at ISO800. If that is underexposed I force a 6s exposure at ISO800 and hope for the best.
It took some trial and error to work out suitable brightness levels, but the process works very well. I'd prefer to have a full automatic option and to be able to go beyond 6s, but unfortunately this is not currently possible. Images are collected every 15 minutes and a video clip is generated from each of the images at the end of the day using AVConv.
I installed Apache and PHP and put together a basic web page to present the temperature graphs, sky videos and the most recent still image. This allows me to use a web browser to view the sky conditions. The temperature graphs will be a useful resource for recording temperature variations while I'm imaging.
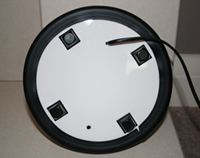
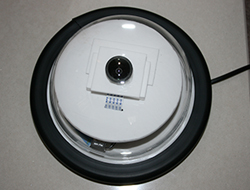
After completing the scripts and getting everything working I set to work on building the weatherproof case. I decided to build the container out of white Perspex and I bought a ready-made Acrylic dome. The first fish eye lens I tried with the Pi Noir camera was a failure, but the second one I tried does a fairly good job. I found one designed for mobile phones which is a super wide angle lens rather than a proper fish eye lens. For £5 it was quite a bargain. I used superglue to bond the pieces of Perspex together which hold the Pi and the camera in place, and added a bag of silica desiccant before I placed the Acrylic dome on top. I'm hoping this will reduce condensation within the dome. The dome is sealed down using transparent Silicone sealant and I've added a rubber edge to make the whole thing look a bit more professional.
I did discover that the dome traps the heat generated from the Pi which causes the temperature readings to be about 3 or 4 degrees higher than they should be. Some internal reflections are visible in bright conditions, though I think I can live with both of these issues. The 6s exposure threshold will seriously restrict how useful the camera will be during the hours of darkness, though on cloudy nights the light pollution illuminates the clouds sufficiently for them to be seen clearly. It is possible to see the brighter stars on clear nights. Since I'm only collecting exposures every 15 minutes I'm unlikely to detect meteors, though I could consider increasing the frequency. I don't think I can increase to anything more frequent than about 2 minutes due to the time my script will take to determine the exposure time. I can live with these issues for now, but may well tinker with the settings over the course of time. Of course, if the Pi camera exposure threshold is increased I will certainly update the code to take advantage of this change! My only hope at the moment is that the container is watertight and the sun doesn't cause either the dome to change colour or damage the sensor. I'm also concerned that the SD card may eventually fail. This is very much a prototype, and I'm sure I'll learn a lot from this to make the second version even better.
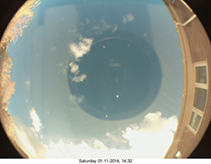
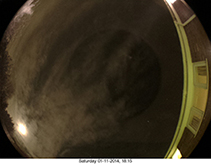
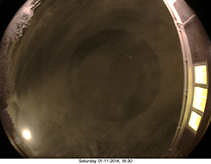
Here are a few sample images taken with the camera. As you can see, the images collected during the hours of darkness would benefit from a longer exposure and all images have a degree of internal reflection. The bright circle at the bottom left of the night time images is the Moon.
